Step-by-step: publish the DKIM, SPF and DMARC records for your domain at Vercel, then verify it with SendFlit.
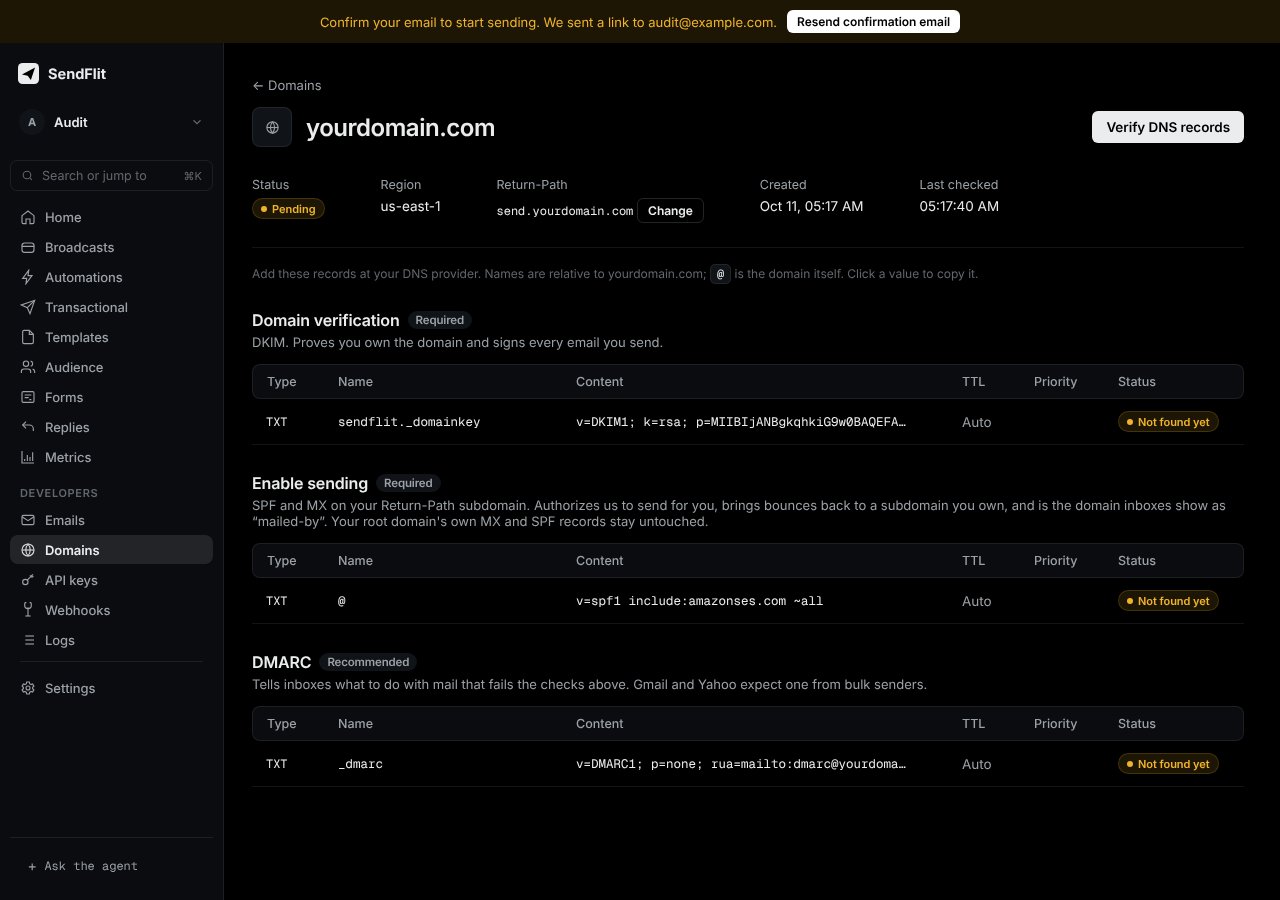
Publish the three records SendFlit shows you for your domain at Vercel, then verify the domain. This takes about 10 minutes, plus DNS propagation time.Start from the Domains page in your SendFlit dashboard. It lists the exact names and values for your domain. Copy them from there, not from this page.
Vercel dashboard → Domains → select your domain → DNS Records → Add.
The records for your domain in the SendFlit dashboard. Copy each value from here.
2
Add the DKIM record
Type: TXT. Name: sendflit._domainkey (or the name the dashboard shows). Value: copy the full value from the dashboard.
3
Add the SPF record
Type: TXT. Name and value: copy both from the Enable sending section of the dashboard. Depending on your setup this record is on the root domain (@) or on your return-path subdomain (for example send.yourdomain.com). Use the name the dashboard shows, not the one you expect.
If you already have an SPF record that starts with v=spf1, don’t add a second one. Add the include: part from the dashboard to the existing record instead.
4
Add the DMARC record
Type: TXT. Name: _dmarc. Value: copy it from the dashboard.
5
Save and verify
Save all records. Then verify the domain:
curl -X POST https://api.sendflit.com/v1/domains/<domain_id>/verify \
  -H "Authorization: Bearer $SENDFLIT_KEY"
Or click Verify in the dashboard. If verification fails, wait a few minutes and try again.
Each command should print the value you added. If nothing appears after 30 minutes, check that the record is saved at Vercel and that the name matches.